**Benefits of Rigid Stock and Definitive Guide to Create Rigid Boxes**
What are Rigid Boxes?
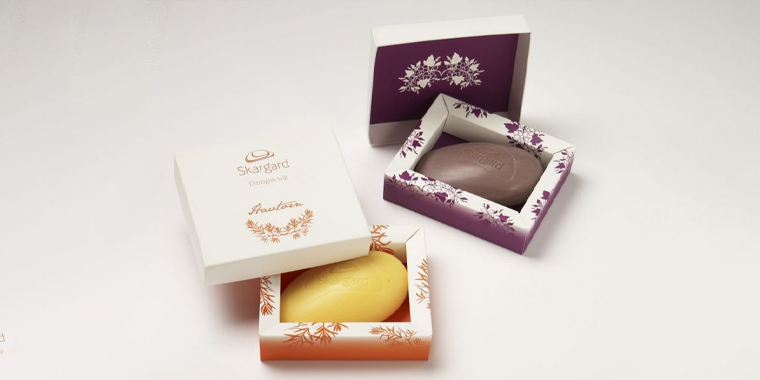
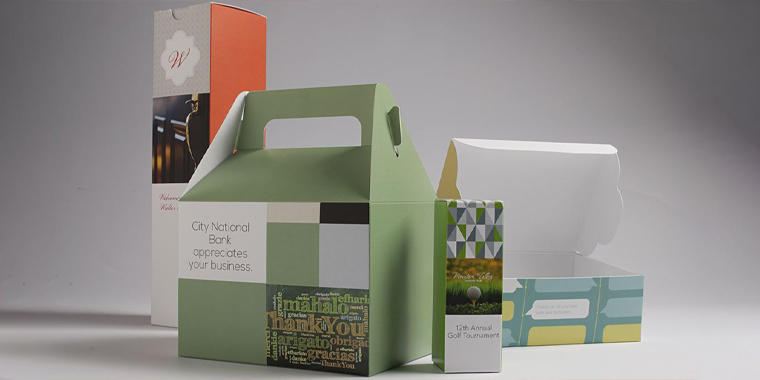
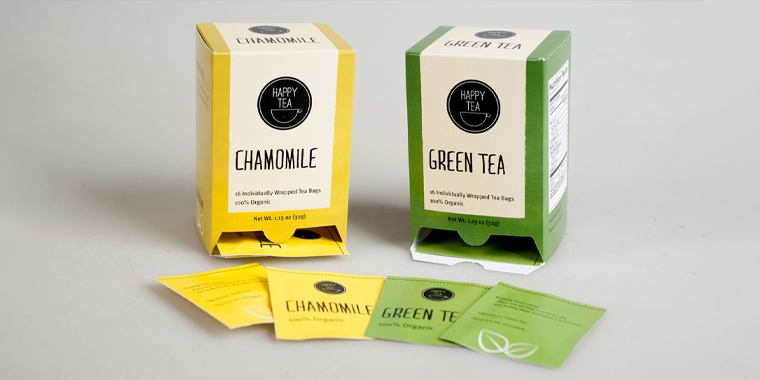
At Get Packaging Services, we understand the importance of packaging in today’s market. One of the most popular and durable packaging options is rigid boxes. Also known as cartons or corrugated boxes, rigid boxes are made from sturdy materials such as cardboard, paperboard, or plastic. These boxes are designed to provide maximum protection and support for your products during shipping, storage, and display.
Benefits of Rigid Stock
Rigid stock materials offer numerous benefits that set them apart from other packaging options. Here are some of the advantages of using rigid stock:
- Durable**: Rigid boxes are designed to withstand rough handling, making them ideal for shipping fragile or heavy items.
- Customizable**: Rigid boxes can be customized to fit your specific product packaging needs, including shape, size, and design.
- Cost-effective**: Rigid boxes are often more economical than other packaging options, especially for large or bulky products.
- Environmentally friendly**: Many rigid box materials are recycled, making them a more eco-friendly packaging option.
- Professional appearance**: Rigid boxes can be printed or branded with your logo, making them a great way to showcase your brand.
How to Create Rigid Boxes
While rigid boxes are a popular packaging option, creating them can be a bit complex. But don’t worry, we’re here to guide you through the process. Here are the steps to create your own rigid boxes:
Follow these steps to create rigid boxes:
1. **Design your box**: Use computer-aided design (CAD) software or graphic design tools to create a design for your rigid box. Consider the size, shape, and features you need for your product.
2. **Choose your material**: Select a sturdy material for your rigid box, such as cardboard, paperboard, or plastic. Consider the weight and durability requirements for your product.
3. **Cut your material**: Use a cutting tool or machinery to cut your material to the desired size and shape.
4. **Assemble your box**: Use adhesive or automated machinery to assemble your rigid box. Make sure to align the flaps properly and secure them with tape or staples.
5. **Print and decorate**: Add your branding or packaging design to your rigid box using printing or labeling technologies.
6. **Finish and inspect**: Inspect your rigid box for any defects or damage. Add any finishing touches, such as a hinge or closure.
Tips and Tricks for Creating Rigid Boxes
Creating rigid boxes requires attention to detail and careful planning. Here are some tips and tricks to help you create high-quality rigid boxes:
- Use a die-cutting tool**: A die-cutting tool can help you create precise cuts in your material, reducing waste and improving accuracy.
- Choose the right adhesive**: Select an adhesive that is suitable for your material and intended use.
- Automate assembly**: Consider using automated machinery to assemble your rigid boxes, especially for large or complex designs.
- Test and iterate**: Test your rigid boxes for durability and functionality, and make adjustments as needed.
Conclusion
Rigid boxes are a popular packaging option due to their durability, customizability, and cost-effectiveness. By following the steps outlined above, you can create your own rigid boxes that meet your specific product packaging needs. At Get Packaging Services, we’re committed to helping you achieve your packaging goals. Whether you need customized rigid boxes or other packaging solutions, we’re here to help. Get Packaging Services for all your packaging needs today!